Saturday, July 31, 2010

Stamp-a-thon


Does an entire day of stamping and papercrafting with like minded people sound good to you? Want to combine it with helping a good cause? The registration form for Stamp-A-Thon 2010 has just been released. Each year this event gets bigger and better and this is the fourth year that Makeesha Byl has held this amazing event to raise funds for the National Breast Cancer Research Foundation. It will be held at the  Free reformed Church, Armadale. Church hall. 84, Fifth rd, Armadale. Time 9am-4.30pm on Saturday the 4th of September 2010.

If you were one of the participants last year I'm sure you will want to join in the fun again this year. We would love to see some new faces at this years event as well as familiar ones, so be quick to register and save your seats for this amazing event.

Here is the link to the registration form here. I'm going to be helping out on the day so we'd love to see you there whilst also sharing the fun while raising funds for this very worthy cause. 

Wednesday, July 28, 2010

Chocolate Slider

Are you ever stuck for a quick, unisex gift that you need NOW! Well a real favourite of mine is the chocolate slider box. It is super simple & needs just one sheet of A4 cardstock and a bar of chocolate (most of the time I stock up when these are on sale, but I have to make sure I hide them from my boys!). Basically for this one I had a 100g bar of Cadbury chocolate so I scored 1.5cm along the longest side of the A4 sheet, then along the shorter side I scored at 1.5cm, 9cm, 16.5cm, 18cm & cut it at 20cm. Decorate it as desired, use sticky strip to make it into an open ended box, add a slot punch at the top, thread the ribbon through, add the chocolate and tie the bow and you're done! Honestly it took me longer to write this blog post than to make it and the best thing is you can fiddle around with the bow as long as you like to make it perfect as the recipient never needs to undo it to get to the chocolate, they just pull the bow upwards.


and open......just pull the bow upwards


I added the word on the front and raised it up on Stampin' Dimensionals just to make the front pretty!


Stamps: Baroque Motifs
Ink: Old Olive, Melon Mambo
Card stock: Very Vanilla & Old Olive
Accessories: Large Oval Punch, Scallop Oval Punch, Slot Punch, Melon Mambo Polka-Dot Grosgrain ribbon, Sticky Strip, Stampin' Dimensionals.

Tuesday, July 27, 2010

Christmas in July

Okay so we're now officially on the downhill run to Christmas (yes someone came and stole part of my year as there's no way it can be almost August already - I have too much to do!). Anyway here's a super quick Christmas card, that has sparkle and versatility! I was also playing with Teeny Tiny Sentiments which is on sale for 20% off until the end of this month! The card uses a technique called brushless watercolour - super simple. I inked up the image with Old Olive for the leaves and used the Chocolate Chip marker on the trunk and ground, then simply sprayed the image with water (hold the spray bottle and rubber stamp about 25cm apart and do 1-2 light sprays, you want the ink to be wet not dripping) and then just stamp onto the card stock and let dry. My advice is to practise this a few times on scrap paper to work out how many sprays works best for your spray bottle/image etc. This particular card was done using whisper white card stock, but it looks really lovely on watercolour paper as well, a very soft blurry look to the image. I then sponged the edges and added some 2way glue and dazzling diamonds (which didn't show up in the photo) in bauble type blobs to give the effect of a decorated Christmas tree.


Stamps: Lovely as a Tree & Teeny Tiny Sentiments
Card stock: Real Red, Chocolate Chip, Certainly Celery & Whisper White
Ink: Chocolate Chip, Old Olive
Accessories: Big Shot Perfect Polka Dot Textured Impressions, 2-way glue pen, Dazzling Diamonds, SNAIL, Stampin' Sponge, Word window punch, Corner Rounder Punch (yes it is available it just got left out of the Oz 2009-10 catalogue by mistake!)

Saturday, July 24, 2010

Chalk Technique

Chalks or Stampin' Pastels are a really versatile thing to have in your crafting kit - you can apply them directly to the card stock to give a soft look, or make the pastels "pop" by stamping an image in Versamark or White craft ink and then dabbing the pastels over the top with a cotton tip or sponge dauber.

I ran a class in how to create 3 very different effects with the Stampin' Pastels a couple of months ago and here is one of the cards from that class (the scallop oval punch is a carry over item from the 2009 Spring mini catalogue and can still be ordered), hard to tell with my photography, but the greeting was raised up on Dimensionals.


Stamps: Tart & Tangy, On Your Birthday
Paper: Elegant Eggplant, Basic Black, Old Olive, More Mustard
Ink: Whisper White Craft Ink
Accessories: Stampin' Pastels, large oval punch, scallop oval punch, 1 1/4" square punch, gold brads, paper piecer, old olive 5/8" grosgrain ribbon, SNAIL, Stampin' Dimensionals, sponge daubers.

Friday, July 23, 2010

Time is running out to get a permanent SU discount!!!

The starter kit when you join Stampin' Up! is on super sale at the moment, but only for another week!!! You'll save 20% on the already discounted starter kit. That's an additional saving of $65. For just $259 you'll receive over $560 of Stampin' Up! product and all the supplies, plus all you need to start your own business. You can choose which ink pad colours, stamp sets, cardstock colours and roller wheel you want so you get exactly what you want at a fantastic price! Click here to see the Starter Kit order form in detail. Plus as a bonus I will give you a welcome gift as well! The if you place an order as a demonstrator in the first 45 days of joining you get a 30% discount off your order, which them reverts back to the standard 20% discount (this does increase with sales volume).


Send me an email today or phone me and I'll send out more information about becoming a Stampin' Up! demonstrator including how to earn free stamps, demonstrator discounts, training events and minimum ordering quotas and suggestions and assistance on how to meet them!


I can mail out the application forms to you or you can do it instantly online, you just need a credit card and an ABN number. Simply head to my Stampin' Up! business website and click on the 'Start your own business' button at the top right. Remember there are all sorts of Stampin' Up! demonstrators, from those who buy for themselves personally to get a discount on their supplies, to a hobby demonstator who occassionally does a class or party, to those that make it their full time business creating a second income and winning wonderful incentive trips with your partner - this coming year it's to Fiji so if that's not a temptation I don't know what is! 
  

Thursday, July 22, 2010

Cottage Garden Class photos

Back in April I did a Mothers Day class based upon a couple of the new autumn/winter mini catalogue stamp sets. It was based upon a class from  Andrea Walford  (but we don't have the same stamp sets that they have available in North America - so I adapted the design) anyway I finally got around to taking some photos of the class. The class including all supplies you need to make the 4 cards and card box is just $20. Of course if you would like to get together with friends and do this class at anytime just email or phone me and I'd be happy to accomodate. You can also see a full list of events & classes on my website at anytime.


Here's a close up of part of the box front - do you like the layers and depth that is added by the use of the Stampin' Dimensionals and the glitter, all of the butterfly wings are free from adhesive as well so you can gently pop them up to give more an illusion of flying. Personally I also love the effect a simple line (or two) or paper piercing can add.


Supplies
• Stamps: Cottage Garden & Teeny Tiny Sentiments
• Ink: Rich Razzleberry, Pale Plum, Old Olive, Basic Black Classic inks 
• Paper: Rich Razzleberry CS, Pale Plum CS, Old Olive CS, Whisper White CS, Cottage Wall DSP, Whisper White Envelopes
• Accessories: Snail adhesive, Stampin’ Dimensionals, mini glue dots, Sticky Strip, Crystal Effects, Silver brads, Dazzling Diamond glitter, Button Latte, paper snips, Stampin’ Scrub, Stampin’ Mist, Bone Folder, Stamp-a-ma-jig, Paper Piercing tool, Mat pack, Paper Cutter with scoring blade, Scallop Edge punch, Large Oval Punch, Pencil and ruler, Velcro pieces.


The Last Chance List is coming.................and some are gone already!

Well for those of you who are veteran Stampin' Up! people, you know that a month before the new catalogue and ideas book is launched Stampin' Up! releases the retirement list - well it's now been aptly renamed "The Last Chance List". That is a list of all of the products that will not be carried over into the new catalogue and many will be sold of at lovely discounts. We saw a sneak peek of a couple of these items in the 20% off two step stampin' sale for this month, but the retiring list is a lot longer. However I would like to say if there is something you want that is retiring, be it an ink colour, card stock or stamp set, get in early is my advice as once they are gone - they are gone forever - unless you are fortunate enough to find it pop up on EBay at a premium in years to come!!!

The June deal of the weeks saw us completely sell out of the Sweet Slumber Designer Specialty Paper and the Close to Cocoa card stock has also been completely depleted, however the later is also included in the Earth Elements A4 assorted pack (item 106556), the Earth Elements 12" x 12" assorted pack (item 106527), and the textured Earth Elements assorted pack (item 108697). All of these assortments are also only available while supplies last.

This week we have also been told some of the other colours of retiring card stock is already running low as this happens they will be substituted with textured card stock, but only whilst supplies last, currently the below colours are running low:

Almost Amethyst A4 (item 108621)

Blush Blossom A4 (item 108617)
Cameo Coral A4 (item 108603)
Creamy Caramel A4 (item 106567)
Gable Green A4 (108592)
Lavender Lace A4 (item 108622)
Pale Plum A4 (item 108616)
Sage Shadow A4 (item 108620)
Taken with Teal A4 (item 108609)

Because the demand for each colour varies, Stampin' Up! are unable to specify at what point textured card stock will be substituted for smooth. There will be no change in item number or price for these substitutions. If you do not want to keep the textured card stock, I can arrange for you to return it for a refund. 

I understand that it is very frustrating when something you want is no longer available, however I would also say think of all the wonderful new items that are coming very soon (less than 6 weeks now!!) and I for one personally agree with Stampin' Up!s decision to put their resources into manufacturing the new products to ensure their consistent supply rather than switch back to manufacturing the products that will be discontinued soon. 

Please don't hesitate to check back on here as I will be letting people know as soon as I can what has run out or is running low.


Tuesday, July 20, 2010

Calorie Free Cake!

I wanted to make a little token gift for one of my son's favourite carers at daycare as it was her birthday on Friday, always a challenge as you want to give them something that says I care, but not something that will clutter! Anyway I remember seeing a slice of cake made from card stock years ago - so I went hunting for the template - you have to love that about Google - don't you?? Anyway long story short my search came up with lots of choices, but in the end I settled on this one from Victorine Originals  (another great website for templates to print out is Mirkwood which I also has a cake slice box, so if you wanted to have a go at making something similar just have a Google first to see what's out there) so I printed it out and went to work......this was the result - what do you think? . I made up a little bag of chocolate sultanas to pop inside with a little gift tag & I'm not sure who was happier this morning - myself that a mental image came out almost identical in reality, my son as he got to give his carer a lovely present or the carer at the gift of chocolate!!!


I printed out the template onto normal printer paper and then cut and traced it onto the chocolate chip card stock. The Dazzling Diamonds glitter I applied with Crystal Effects over some of the swirls on the icing part of the cake, my personal preference is for Crystal Effects over the 2-way glue for this type of project as unlike a card, this is more likely to be handled more and thus the glitter needs to be stuck on better - if that makes sense? I sponged the edge of each flower petal, the greeting oval and the edge of the pink icing to add a bit more dimension.

Stamps: Crazy For Cupcakes & So Swirly jumbo wheel
Card stock: Chocolate Chip, Very Vanilla, Pink Pirouette
Ink: Pretty in Pink & Chocolate Chip.
Accessories: Jumbo wheel handle, gold brad, paper piecer, scallop circle punch, large oval punch, scallop oval punch (still available to order even though it was in the Spring mini), Crystal Effects, Dazzling Diamonds, paper snips, Stampin' Sponge.
Gift bag: Very Vanilla taffeta ribbon, scrap of Pink Pirouette card stock, chocolate chip ink Stampin' Write marker pen to colour in one of the cupcakes on the cupcake tower from Crazy For Cupcakes, 1/16" handheld hole punch, hemp twine & a small cellophane bag.

Thursday, July 15, 2010

Baby Card

Well it seems a lot of my friends are expecting additions to their families in the next few months (seven so far including a set of twins!) - so I thought I would get a start on some of their cards - well that and I have a baby card class coming up at the end of the month (see my website calendar for details) and wanted to make some new cards for it. Anyway I've seen lots of these baby onesie type cards floating around on blogs and had a hand at making some earlier in the week.......

A close up of the centre piece - it's textured by using a paper piercer to go around the scallop circle. The circle piece is sponged with Old Olive ink and then the layered piece is raised up with Stampin' Dimensionals to give the card more interest.


I remade it reversing the colours - but instead of going over the base cardstock with a jumbo roller wheel, I scored it uniformly to form lines - it made a nice textured piece of cardstock which I thought gave it a different look to just stamping over the card.


I had planned to make a third version using designer series paper on the front - so it would then give me three different looks for one card style - but I've been time anemic due to school holidays. Once I had sorted out the positioning of the punches to get the legs right, the rest of the card was easy. For sticking on these little bits like the scallop trim I tend to find the Tombow multi purpose adhesive to be really good, although it takes a minute or so to dry.

Stamps: Best Yet (hostess level 1) & See You Around Jumbo wheel (for first card)
Cardstock:  Old Olive & So Saffron
Ink: Old Olive
Accessories: 1 3/8" circle punch, scallop circle, single hole punch (non SU), paper piercer, mat pack, Stampin' Dimensionals, Tombow multi purpose adhesive, scoring blade on Fiskers cutter, Stampin' sponge.

Saturday, July 10, 2010

Brick Wall Technique

Every month our little Stampin' Up! group has the opportunity to participate in a swap, normally it's a card, but occassionally it's a 3D or scrap page, last month we did a technique swap. Well I was severely time anaemic for most of last month for a myriad of reasons and when I'm short of time my stamping is the first thing to go!! Anyway I went blog surfing and found a really simple technique called "brick wall" and yes it really is as simple as it sounds. You take a normal stamped and coloured image and cut it up like little bricks and then stick it all back together with small gaps between the pieces to represent the cement.

So this card I made - I love this new level 2 hostess set from the autumn/winter mini catalogue!


Then I re-made it, but cut the image into bricks first, (hint: keep the pieces in sequence when you cut them - unless you like doing jigsaw puzzles!) after I had stuck it all down I thought I should have sponged the edges of each brick to give it a more subtle appearance.........maybe I'll make a 3rd version when I get time!


Stamps: Asian Artistry (level 2 hostess set)
Inks: Rich Razzleberry, Basic Black, Old Olive & Soft Suede
Cardstock: Rich Razzleberry. Melon Mambo, black & very vanilla
Accessories: Aqua painter brush, SNAIL, paper trimmer

So what do you think? A super simple, yet effective technique you could use with virtually any larger sized image stamp. Do you prefer the bricked or unbricked card (dodgy photography aside that is!). Of course if you'd like to earn this stamp set for free - host a party or a catalogue party and depending upon sales it could be one of your rewards!

Thursday, July 8, 2010

Some Cottage Garden Creations

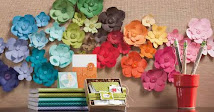
Hi - I thought I'd share some Cottage Garden creatiosn with you - on sale this month for 20% off - I must confess I have mainly used this set in the Pale Plum & Razzleberry colour combination to match the Cottage Garden Designer Series Paper, although I did branch out a little last week into So Saffron & Black after soem blog surfing and I really like this more dramatic colour combination.

The first two cards were photographed whilst still in the plastic sleeve (I keep the cards in plastic sleeves if I am using them at demos etc so people can handle them without the cards getting damaged) so the strip of razzleberry cardstock in the first and DSP in the second card looks as if it has ripples when it doesn't - it's just the light reflecting on the plastic! You also can't see from my dodgy photography, but the centres of the flowers are glittered and the large flowers are raised up on dimensional dots to give more depth and interest to the cards.


Stamps: Teeny Tiny Sentiments & Cottage Garden
Cardstock: Whisper White, Rich Razzleberry & Cottage Garden Designer Series Paper
Inks: Pale Plum, Rich Razzleberry, Old Olive & Basic Black
Accessories: Silver brads, paper piercer, SNAIL, Crystal Effects, Stampin' Dimensionals, stamp-a-ma-jig & Dazzling Diamonds Glitter.


Stamps: Cottage Garden
Cardstock: Whisper White, Pale Plum, Old Olive & Cottage Garden Designer Series Paper
Inks: Pale Plum, Rich Razzleberry & Basic Black
Accessories: Silver brads, paper piercer, SNAIL, Crystal Effects, Stampin' Dimensionals, stamp-a-ma-jig & Dazzling Diamonds Glitter.


The ribbon on this favor box is held in place with a knot of hemp twine and then a pale plum butterfly stick on top to cover the knot. Each of the toffees inside is over-wrapped with a strip of Cottage Garden designer series paper.

Stamps: Vintage Vogue & Cottage Garden
Cardstock: Whisper White & Pale Plum
Inks: Pale Plum, Rich Razzleberry & Old Olive
Accessories: Big Shot with Fancy favor die, clear rhinestone brads, paper piercer, SNAIL, Crystal Effects, Stampin' Dimensionals & Dazzling Diamonds Glitter, 1 3/4" circle punch, horizontal slot punch, hemp twine & Rich Razzleberry polka dot ribbon.
Non SU items: Werthers toffees & acetate.

This card was CASEd & altered from Danie May and I loved being able to get out of the purple colour combinations for this set!! The leaves are all punched with the new Two-Step Bird punch and if you are wondering when I get time to cut all my flowers - it's when I'm multi tasking and watching my son's swim  or  gym lesson. I keep metal pencil case tin with the stamped images and a pair of the super paper snips and just cut as many as I can between watching the children's exploits.........also a conversation starter in some instances which is never a bad thing when you are in the market for new customers!

Stamps: On Your Birthday & Cottage Garden
Cardstock: Whisper White, Basic Black, Old Olive & Windsor Knot Designer Series Paper
Inks: So Saffron & Basic Black
Accessories: Gold brads, paper piercer, SNAIL, Crystal Effects, Stampin' Dimensionals, Photo Corners punch, two-step bird punch, stamp-a-ma-jig & Dazzling Diamonds Glitter.

Okay so are you all inspired by the lovely Cottage Garden stamp set?? It really is a quite versatile set and I have used it a lot more than I ever thought I would when I first purchased it - now I just have my fingers crossed that it doesn't retire at the end of August!!!

Saturday, July 3, 2010

Two-Step July Super Sale!

Well after the deals of the week throughout June - I can't believe the fabulous sale special for July - 20% off 8 different stamp sets! Stampin' Up!'s Two-Step Stampin' sets allow you to quickly and easily take your creativity to the next level & from 1-31 July, you'll get 20% off select Two-Step Stampin' sets from our current catalogues--no limit, no minimum purchase required! One thing you probably will need to make the two step stamping work perfectly however is a Stamp-a-ma-jig a funky little tool that allows you to perfectly align your stamps in any position every time (#101049 $22.95 page 155 current IB&C). If you have never seen the two-step stamping in "action" feel free to contact me and I'd be happy to demonstrate it to you - you could make it a lot of fun by getting a few friends together and making it a stamping workshop which is free, fun and full of ideas, plus you get gifts for hosting and everyone gets some hands on experience with Stampin' Up! products doing their own make & take.


Choose from any of the stamp sets listed below:


Item ---Page--- Description ---Regular Price--Sale Price


116386 -39--- Loads of Love-- -$39.95--------$31.96

116342 -42- Big Bold Birthday**$53.95 -------$43.16

115860- 78- A Rose is a Rose**- $66.95 -------$53.56

116332 -86 --Playful Petals**--$52.95--------$42.36

115770 -98--Cheep Talk-------$47.95 --------$38.36

115946-115 -Wonderful Favourites$39.95 ----$31.96

119187 -14* Tiny Tags (wood-mount) $38.95- $31.16

118592- 14* Tiny Tags (clear-mount) $28.95-$23.16

119163 -31* Cottage Garden (wood-mount)$32.95 -$26.36

120003- 31* Cottage Garden (clear-mount)$24.95 -$19.96

*From 2010 Autumn-Winter Mini Catalogue


**Retiring stamp sets!

Yes - it is a bit sad to see that last line of information - not long now until August 1st when the entire list of retiring products comes out - but I'm sure the sadness of losing some lovely items will be replaced with a LOT of excitement come September 1st when the new Catalogue & Ideas Book is released! Here's a few items I've made with the Cheep Talk set in the past:


wrapping paper & gift card to match


and a close up of the little gift card


Or one of my favourites the Loads of Love Stamp set:

How cute is that - you can chose who is driving the ute and what goes in the back of it - so much fun and very versatile - I've even done wedding cards with this one by putting both of them in the cab & attaching some little barrell beads on strings that looked like cans trailing behind the ute with the greeting in the tray of the ute.


I also have a number of cards & boxes made & embellished with the lovely Cottage Garden stamp set, but I'll save those for another post or this one will end up being so long it'll fall off the screen page! So if you are interested in any of the specials, learning more about how to do two-step stamping or hosting a demo please contact me as I'd be happy to help.